
Grinders are a key element in the weed consumption process.
Even so, grinders often get neglected and are left to collect gunk which can negatively impact your experience.
Trust us. Maintaining your equipment is a worthwhile use of your time.
Find out the best way to clean your grinder with this complete step-by-step guide on cleaning a weed grinder.
Table of Contents
- What Is a Weed Grinder?
- How Do You Know When Your Grinder Needs to be Cleaned?
- How to Clean a Grinder: 5 Easy Steps
- How to Clean a Plastic Weed Grinder
- How to Clean an Electric Grinder
- How to Clean a Grinder and Save Kief
- Hail Mary Jane: Your Trusted Source for Grinders and All Other Cannabis Products
Click The Video Below To See Our Tutorial On How To Clean Your Weed Grinder
What Is a Weed Grinder?
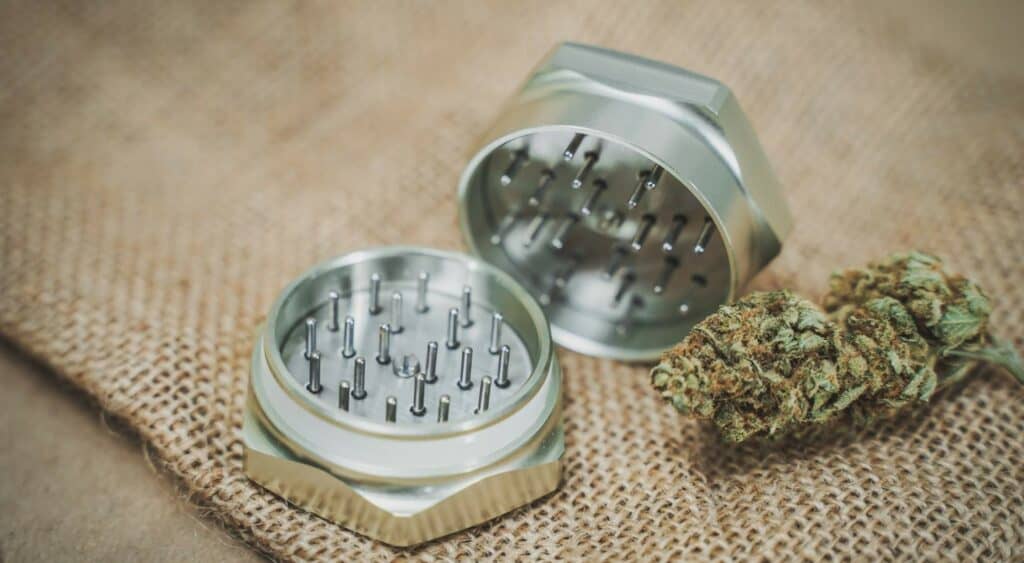
A weed grinder — also known as an herb grinder — is a simple device that is used to break apart the cannabis flower. It is usually comprised of a top half and a bottom half, both of which are fitted with sharp pegs or teeth. When rotated, the teeth shred the cannabis inside.
Grinding your cannabis ultimately makes it easier to pack or roll into a joint.
Grinders are also known to produce the following benefits:
- A smoother, more consistent burn
- Increased efficiency
- Filters contaminants
- Catches/collects kief
- Better taste and smell
Don’t know how to use a weed grinder? Our experts at Hail Mary Jane put together this guide with everything you need to know about grinders.
How Do You Know When Your Grinder Needs to Be Cleaned?
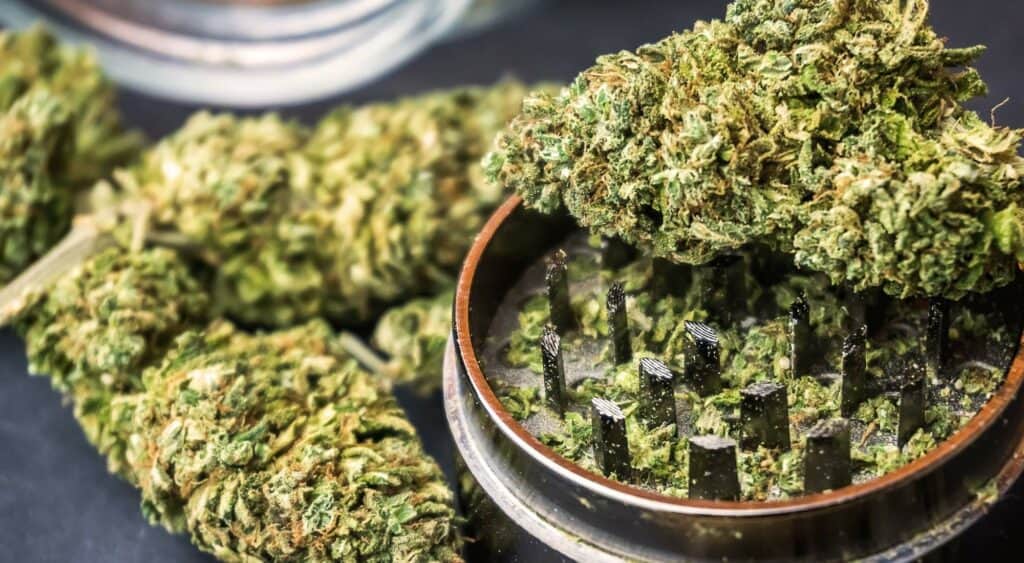
Marijuana buds carry a sticky substance called resin. This resin contains cannabinoids and terpenes, elements found in many oils and flowers.
After several uses of your grinder, this resin begins to build up and leaves a layer of gunk on the teeth.
You should think about cleaning your grinder when you begin to see the resin build-up or when the grinder starts to feel sticky.
You will typically want to clean your grinder every 30-60 days, but it depends on how frequently the grinder is being used.
4 Reasons Why You Should Clean Your Grinder
If you have a grinder, you already know how fantastic they are. Before we go over how to clean a weed grinder, here are four reasons why taking care of your grinder is a worthwhile investment of your time.
#1: For Your Health
Moldy buds are not just the things you take out of your ears after listening to music and leave in your pocket for too long.
Mold growing on your marijuana can be dangerous when inhaling.
Moldy buds can bring about the following serious health issues:
- Chronic pulmonary aspergillosis
- Allergic reactions
- Infection
- Other common lung problems
Moldy weed is especially dangerous for those who have compromised immune systems or existing lung problems.
#2: Grinder Functionality
Although that “sticky icky icky” is being ground into more manageable pieces of mostly ‘icky’, those sticky and icky pieces can cause your grinder to lose its ability to grind well.
Not only do the leftovers that remain block the blades from cutting, making the process harder, but the sticky resin also cannot be easily removed without proper cleaning.
Giving your grinder a good clean every once in a while supports a high-quality grind and overall experience.
#3: For a Smoother Smoke
Anyone that has had a smooth joint, bong hit, or smoke knows that consistency is king.
After all, consistency throughout the leaves is why you bought that grinder in the first place.
The more you use your grinder, the more resin can build up in the parts, causing the teeth to stick. Not only does the sticking make the grinding process more difficult, but it can also turn into quite a mess.
Keeping a clean grinder allows for a smoother grind and smoother smoke.
#4: Extend the Life of Your Grinder
The teeth in your grinder are doing a lot of work.
Regular cleaning and maintenance help those teeth stay sharp and keep your grinder functioning properly.
Grinders are often made with stainless steel materials for two reasons:
- It lasts.
- It is inexpensive.
Like most stainless steel kitchen knives, grinders have to be cared for so that the materials don’t corrode over time.
The resin that sticks to your grinder includes terpenes, a liquid that can cause harm to your grinder’s teeth if never cleaned.
How to Clean a Grinder: 5 Easy Steps
Before you begin to clean the cleaning process, it’s super important to identify the materials that make up your weed grinder.
This is because certain materials don’t mix well with certain cleaning solutions. For example, metals are likely to rust when exposed to water, and no one wants rust mixed into their next smoke.
There are several grinders out there, all with varying shapes, sizes, and features. There are even ‘grinders’ that aren’t really grinders but merely contraptions creative smokers have conjured up using common household items.
That said, the process of cleaning an electric grinder will differ from the process of cleaning a plastic grinder. But don’t worry. We’ll cover how to clean a grinder of any type in the following sections!
#1: Disassemble the Grinder
Carefully take apart your grinder. Your grinder may only have two parts or it could have five, depending on the type of grinder.
If your grinder has a screen, show extra caution when disassembling, as these screens are typically pretty fragile.
#2: Put the Grinder in the Freezer
Once you have all of the parts separate from one another, gently place them in the freezer. The parts should remain in the freezer for at least 30 minutes — 45-60 minutes is even better!
Putting parts in the freezer allows any residue or gunk to harden and makes it easier to remove in the next step.
A good thing to note: Plastic becomes more brittle at lower temperatures. If you’re cleaning a plastic grinder, be gentle with it after removing it from the freezer.
#3: Remove the Residue
Once the parts have sat in the freezer long enough for the residue to harden, carefully remove the grinder parts and begin removing the residue.
A toothbrush, pick, or tiny paintbrush are handy tools for removing those layers of resin from a weed grinder.
Do this process over a cutting board or plate. The bits you remove from your weed grinder should not be wasted as they are some of the best parts of your experience. This step is the most time-intensive step in the process.
But trust us… allowing the resin to freeze makes this step up to 3x faster.
#4: Submerge in Alcohol
If you have a plastic grinder, go ahead and skip down to the next section titled, “How to Clean a Plastic Weed Grinder.”
If you have a metal or another kind of grinder, stick around for this step.
Once all of the resin has been removed (and stored safely for later use), submerge the parts of the grinder into a container or ziplock bag of isopropyl alcohol. Be sure that all parts are covered by the alcohol.
This step will ensure that all residue has been removed.
You will notice that the liquid in the bag will turn a light brown color. This is just the excess resin floating off the ‘hard to reach’ parts of your grinder, making it cleaner and ready to use again.
If you do not feel comfortable using isopropyl alcohol, you can purchase solutions designed to clean resin.
People have also had success with:
- Vinegar and baking soda
- Denture-cleaning tablets
- Vodka
- Water and epsom salts
#5: Reassemble Your Grinder and Enjoy
By now, your grinder pieces should be looking as clean and shiny as the day you brought them home.
If there is any stubborn resin still holding on to your grinder, feel free to repeat the freezing step or the soaking in alcohol step, as either should help get those pesky bits to come off.
Once you’re satisfied with the cleanliness of your grinder pieces, reassemble the grinder and give it a few turns. You shouldn’t feel it stick or anything when turning.
Voila. You’re ready to enjoy your next smoke sesh!
How to Clean a Plastic Weed Grinder
To clean a plastic weed grinder, you will follow the same steps above. Although, instead of submerging your grinder parts into alcohol, you will want to let your parts sit in boiling water.
Be sure to reduce the heat to a gentle boil so the plastic does not melt.
You’ll let the parts soak for about one minute before removing them to air dry for ten minutes.
How to Clean an Electric Grinder
Electric grinders, while not as common as hand grinders, make getting the perfect smoke really easy. If you’re curious, we’ve created a guide to some of our favorite electric grinders.
Cleaning an electric grinder is pretty straightforward.
You’ll want to follow these steps:
- Unplug your grinder and disassemble as much as possible.
- Use a soft brush to sweep away any particles in between the blades and sides.
- Reassemble your grinder and plug in for use.
For a really deep clean…
Continue with these next steps:
- Gride a few tablespoons of rice until completely ground (The rice will collect any remaining plant materials from the grinder blades.)
- Once all residual plant matter is removed, empty your grinder and use a damp towel or cloth to wipe it clean.
How to Clean a Grinder and Save Kief
You can save the kief from your grinder by using these steps:
- Disassemble the grinder.
- Use a scraping tool to harvest the ‘easy to get’ kief.
- Remove the remaining kief with a detail tool.
Just be careful not to damage the screen or it will be useless in catching kief in the future.
Why Save All That Gunk From Your Grinder Anyway?
Kief is the precious jewel in the world of weed. Kief is basically what is left over from the plant when you grind the buds.
The sticky resin that is filtered out into the grinder is the most potent.
After several grinds, a significant amount of resin is left behind (the kief) and can be saved for later use.
Kief can be used for many things. Some include:
- A more intense, smoother smoking experience
- A key ingredient in edibles
- A power high
Grinder Cleaning No-Nos
Some things you want to avoid when cleaning your weed grinder:
- Toxic substances that can irritate the body (like bleach)
- A rough or abrasive brush
Before cleaning your grinder, be sure that the solutions you’re using to soak the pieces are not harmful to your body or your grinder.
Inhaling even a small amount of toxic fumes can be very dangerous.
Soft brushes are best for cleaning as they are less likely to damage fragile parts of the grinder. Often, the parts that break off are microscopic and build up over time. Eventually, the particles can cause irritation to your lungs or overall health.
Hail Mary Jane: Your Trusted Source for Grinders and All Other Cannabis Products
Whether you’re new to cannabis or an old friend, Hail Mary Jane is here to help you find the best cannabis products out there.
We’ve helped millions of cannabis consumers find the best products on the market.
Having been around for over a decade now, we know a thing or two. And since we know that shopping with thousands of brands can be overwhelming, we want to share our industry knowledge and insights with you.
If you want to learn more about Electric Weed Grinders, you can click here and check out the blog post we did where we reviewed some of the best ones we found this year. www.hailmaryjane.com/electric-weed-grinders/ If you’re just interested in Grinders, you can click here and see our blog post on Weed Grinders in general. Also, we’ve got another great article on how to use your own weed grinder if that could be helpful just click the link and check it out.